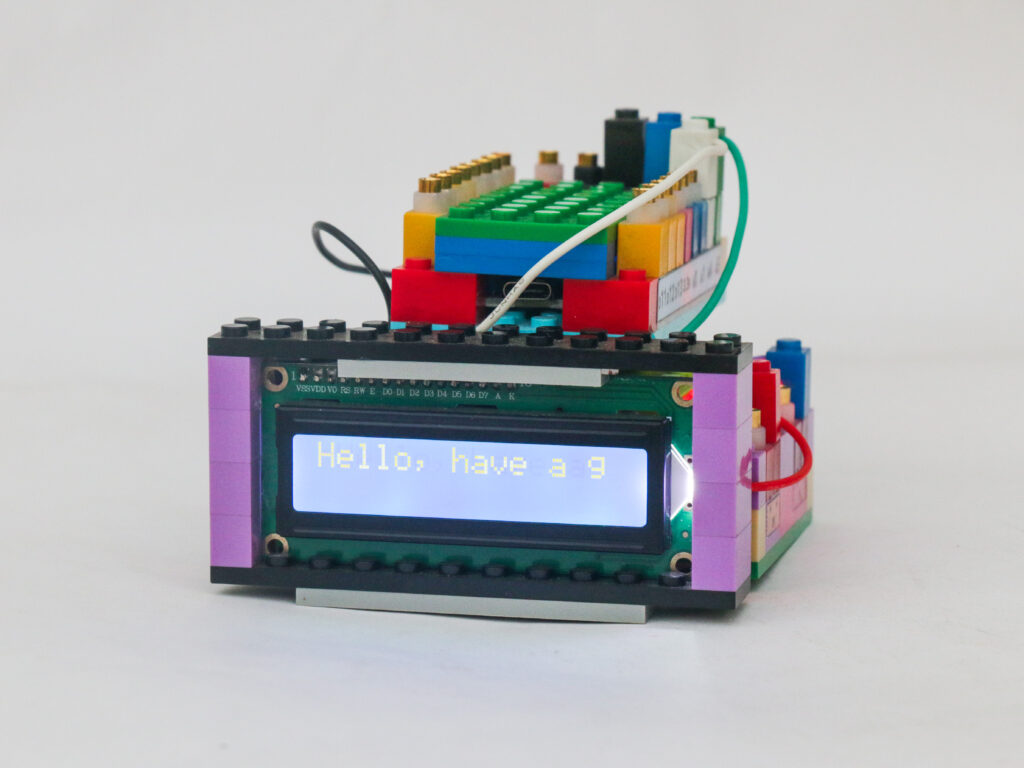
LCD Screen Display Board
We can use an LCD screen to display text, numbers and symbols. We will see how can we use the LCD screen with Arduino to use it in various projects.
LCD stands for Liquid Crystal Display. It has specially engineered crystal chains which can be oriented in particular way when electrical field is applied. When electrical field is applied, the crystals orient in a way to block any light passing through, making that pixel dark compared to other backlit display.
The LCD block houses a 1602 LCD which means it has 2 rows of with 16 characters in each row. Typical LCD screen requires multibit information to display a particular message. The LCD used in the LCD block utilizes Inter Integrated Circuit knowns as IIC or I2C communication protocol.
I2C protocol uses only 2 wires to send messages between different devices. One wire is to send and receive data, while the other wire is to transmit clock signal which synchronizes communication.
Primary device used to transmit or receive message is called master while other devices which are following commands to send or receive information are called slaves. There can be multiple slave devices on a same I2C network. Each device has an address for master device to identify and communicate with.
You can refer to the link to understand more about I2C communication.
Components
- Microcontroller Block
- LCD Block
- Battery Block
- Connectors
Connections
Connect the Vs pin of the battery block to the Vs pin of the microcontroller block. Connect the ground pin of the battery block to the ground pin of the microcontroller block.
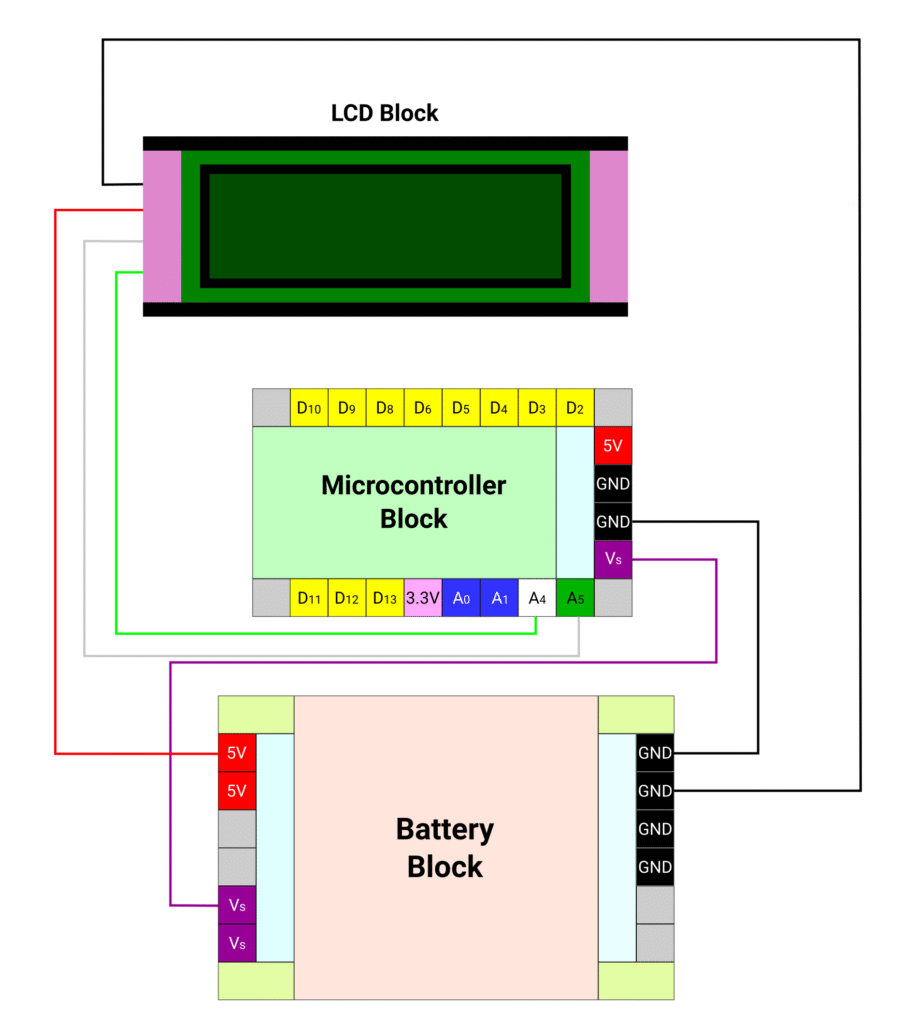
Connect the red terminal of the LCD block to the 5V pin and the black terminal of the LCD block to the ground pin of the battery block. Connect the white terminal of LCD block to the A4 (white) pin on the microcontroller block and connect the green terminal of the LCD block to the A5 (green) pin on the microcontroller block.
Code
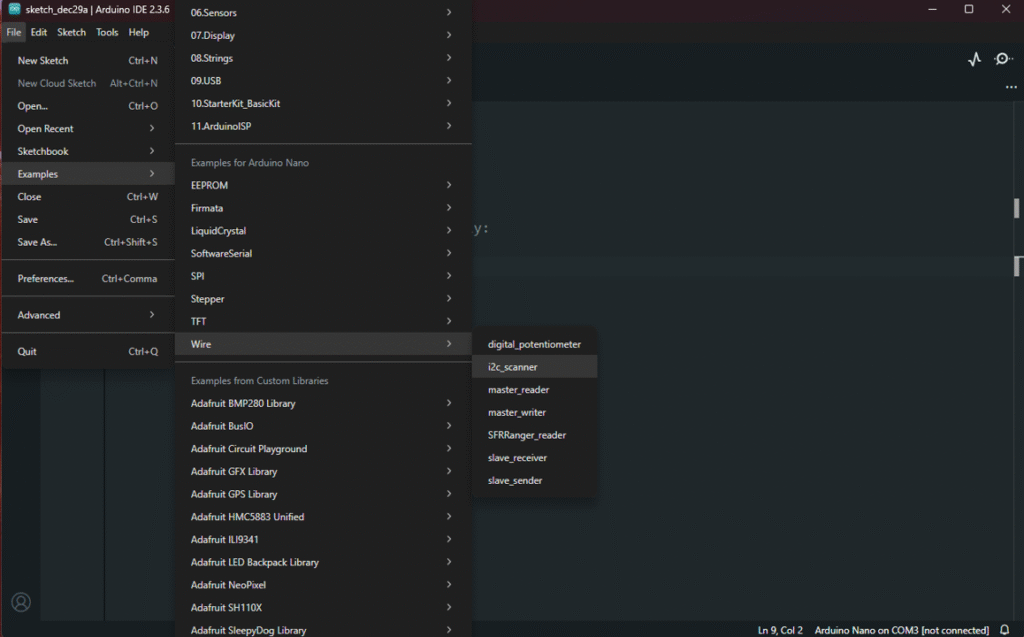
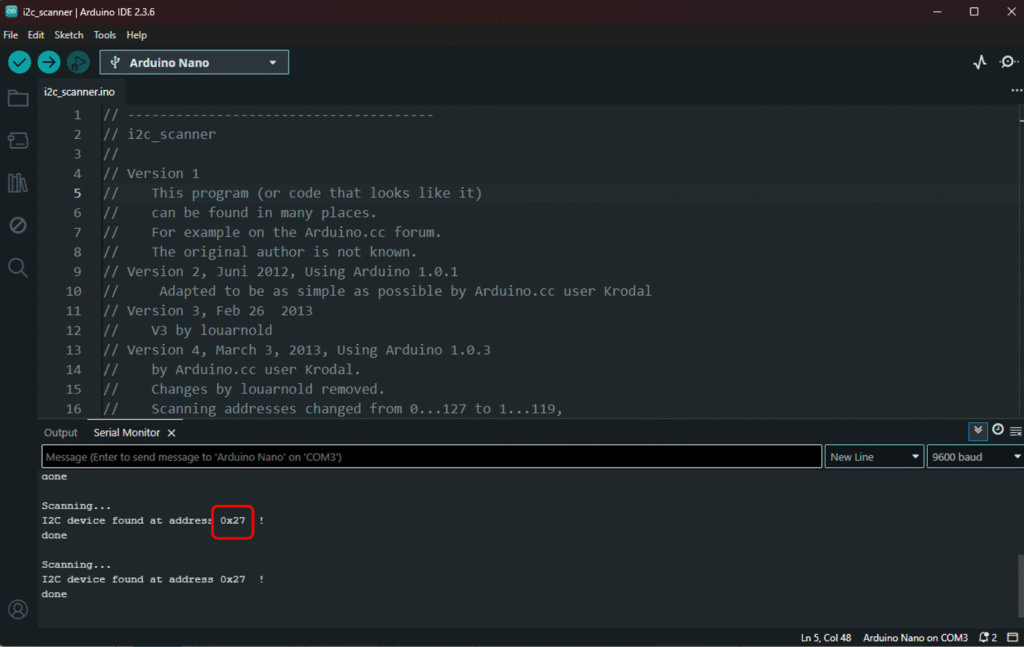
In order to communicate with the LCD block using I2C communication, we need to know the address of the LCD screen. We can find it out using I2C scanner code available as sample code in Arduino examples.
Upload the code and open the serial monitor to see the address of the connected device, which in our case is the LCD block. Note down the address to be used in the code.
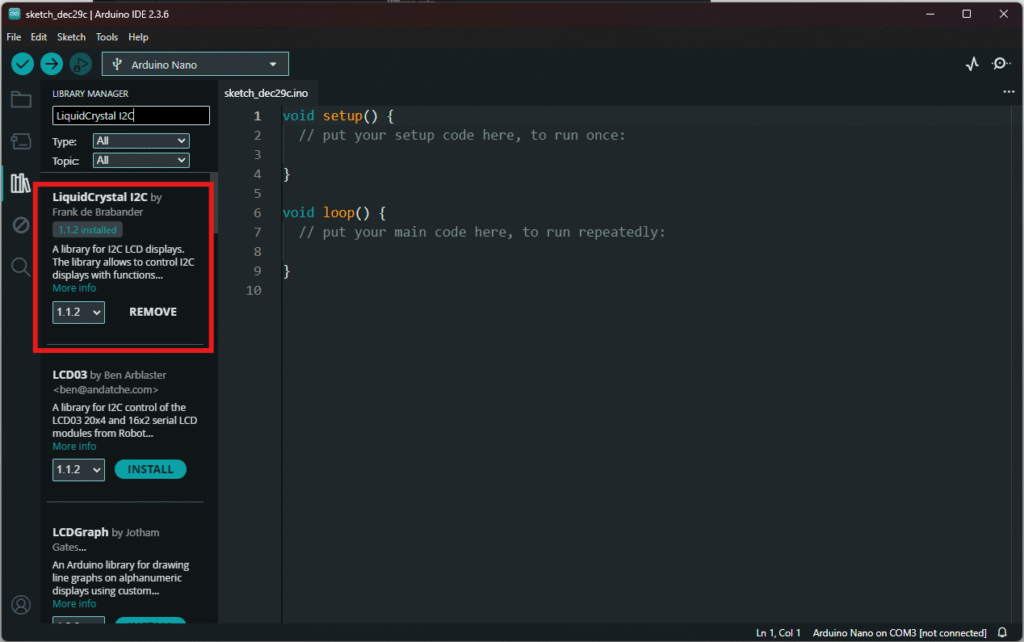
We will also use a library to use I2C communication to LCD screen. Search and install library called “LiquidCrystal I2C”
We will first make a simple code to display a static message.
#include <Wire.h>               //wire library
#include <LiquidCrystal_I2C.h>  //liquid crystal with I2C library

LiquidCrystal_I2C lcd(0x27, 16, 2);  // set the LCD address to 0x27 for a 16 chars and 2 line display

void setup() {
  // put your setup code here, to run once:
  lcd.init();       //  initialize the lcd
  lcd.backlight();  //Turn on backlight
}

void loop() {
  // put your main code here, to run repeatedly:
  lcd.clear();                    // clears any data to LCD
  lcd.setCursor(5, 0);            //set the curser at 6st column & 1st row
  lcd.print("Hello!!");           // print to the LCD
  lcd.setCursor(0, 1);            // set the cursor at 1st colump & 2nd row
  lcd.print("Have a good day!");  //print to the LCD
  delay(5000);                    // refresh every 5 seconds
}
We can make a scrolling message by adjusting how we show the message and refresh the lcd faster as shown below
#include <Wire.h>               //wire library
#include <LiquidCrystal_I2C.h>  //liquid crystal with I2C library

LiquidCrystal_I2C lcd(0x27, 16, 2);  // set the LCD address to 0x27 for a 16 chars and 2 line display

char array[] = "               Hello, have a great day!";  //Message stored as array. Has 15 spaces in front

int len;  // variable to store length of the array
void setup() {
  lcd.init();                            //  initialize the lcd
  lcd.backlight();                  //Turn on backlight
  len = sizeof(array) / sizeof(array[0]);  // find length of the array
}

void loop() {
  for (int j = 0; j < len; j++) {
    lcd.setCursor(0, 0);  //set cursor at top left
    for (int i = j; i < (min(j + 16, len) - 1); i++) {
      lcd.print(array[i]);  // start with character to show at first row & first column
    }
    delay(500);   // refresh twice asecond
    lcd.clear();    //Clears the LCD screen
  }
}